With version 1.2.1 of the GrutBrushes Photoshop plugin you can now save custom sets of brushes so that they don’t all have to be in one big set. In this short video I show you how to create a new set and how to modify which Photoshop brushes it contains.
If you have the GrutBrushes plugin already, you can download the latest one from your account page. If you don’t have it yet, the GrutBrushes Photoshop plugin is free for Photoshop CC 214/15 and you can get it here.
Sometimes people ask me which brush I used to do the shading in this painting and when I tell them it’s the ‘Ocean Liner‘ brush they usually don’t believe me and I really don’t blame them because this is the stroke most people get when they use the ocean liner brush:
Photoshop Brush stroke with average pressure applied
The fact is that most Photoshop brushes have a wide range of looks that you can get simply by varying the pressure of your stylus and sometimes you can find some of the most interesting effects at the very low end of the pressure scale.
By charging the brush size slightly from 20 to 45 pixels and stroking ever so lightly, and lifting my stylus between strokes (this part is important!) I can begin to build up this nice texture.
[baslider name=”lowstyluspressure”]
Now I probably wouldn’t set out to create this with this brush but the point is to not accept your brushes at face value. Experiment and investigate how they behave at the very lowest stylus pressure ranges and you may discover that they, like you, have hidden talents.
I will be doing a series of tutorials on how to use the GrutBrushes Photoshop Impasto brushes but this short video above shows a few brief tips.
To summarise:
– Vary your stylus pressure and use short strokes for a more organic look
– Use a flatter Photoshop brush to block in large areas
– Press softly on your stylus to blend or soften texture
– Push harder when you want more texture
– Use alt/option to pick colours from your painting
Brush Strokes and animated previews
Photoshop Impasto painting with GrutBrushes
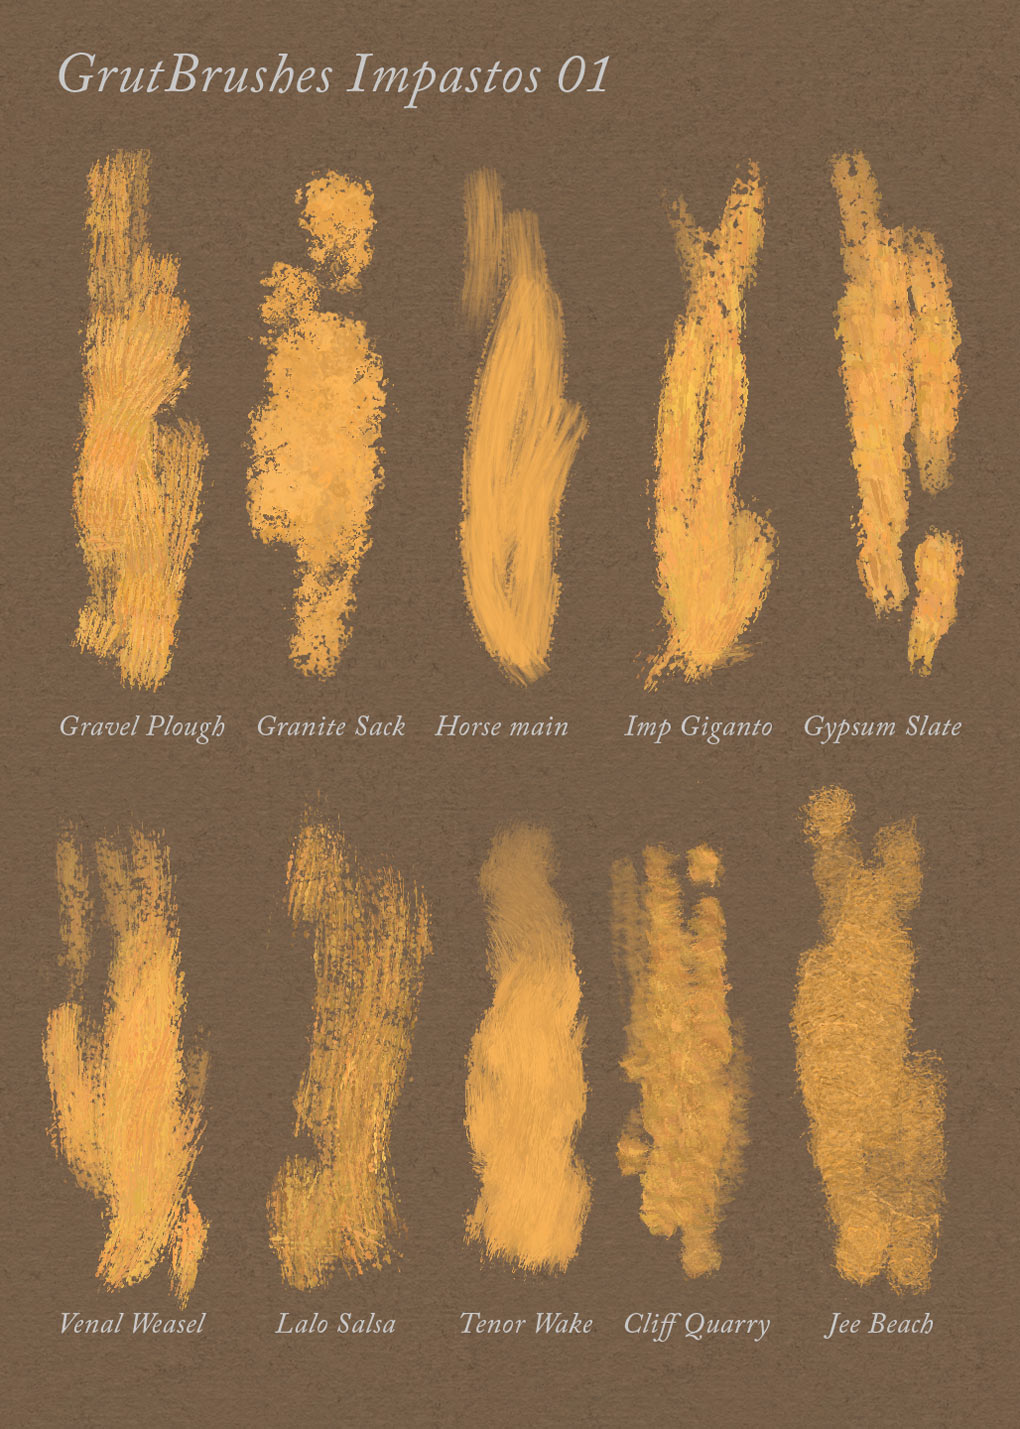
Impasto Brushes from Impastos 01
(Mouseover or tap the icons below to watch the Photoshop brushes drawing ‘live’!)
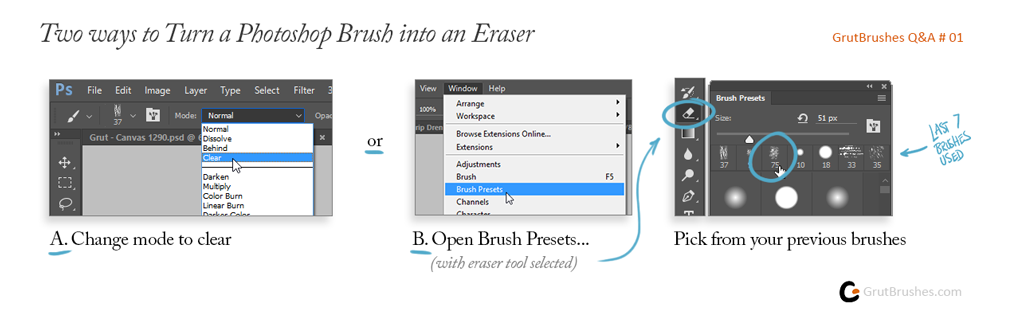
Q: George asked me in an email: “Is there any way to use these brushes as an eraser?”
A: Yes! If you’re painting or drawing in Photoshop using a brush that has a nice organic brush stroke and you want to correct or erase part of your painting using an eraser that has the same look and feel of your brush instead of the default Photoshop erasers there are a number of ways to do so in Photoshop.
Perhaps the easiest is to switch your brush mode from ‘normal’ to ‘clear’ which will essentially turn your current brush into an eraser, with all it’s settings in tact. But what if you have switched brushes or recently changed the settings of your brushes and want to go back to a previous brush? There’s an easy way to do that as well. With your eraser tool selected, just open the brush preset panel and you will see the history of the last seven brushes you used in order. Simply select the one you want to use and your eraser now takes on almost all the properties of that brush.
One of the great things about digital painting is that your canvas can be your palette. By holding down the ALT or Option key in Photoshop you can pick a new color from your current painting’s canvas and continue on. Here you can see me travel a tremendous distance from light to dark just by picking a new darker color from the crevices of my previous impasto brush strokes in Photoshop. This was painted using the new Linsee Dew Photoshop Impasto Oil brush
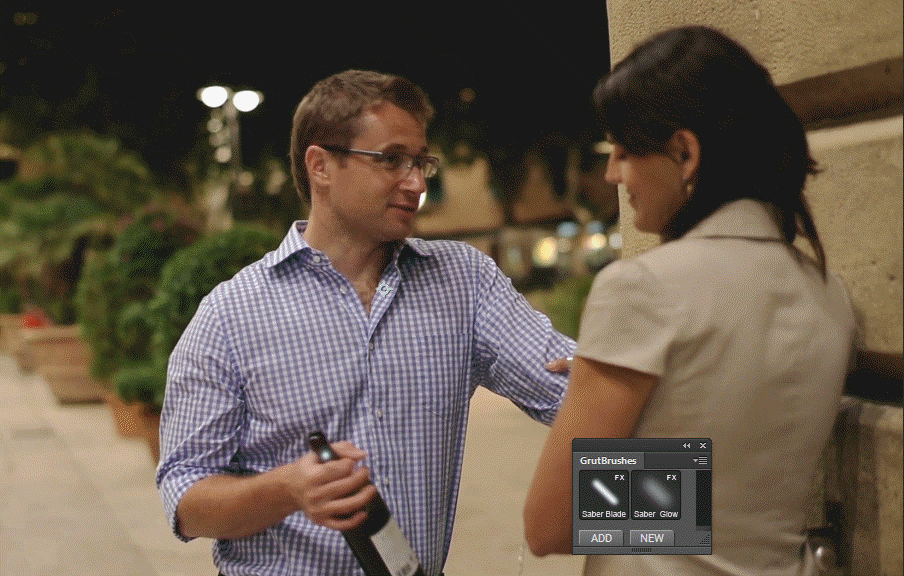
add lightsabers to photos in photoshop with Photoshop brushes
Relive your memories of a night out with friends as a glorious Lightsaber battle instead by adding Lightsabers to all your photos in just a few clicks with these free Photoshop brushes. Use the hashtag #drinksaber so that I can find your creations!
I didn’t get a chance to announce this week’s free GrutBrush on Monday due to my day job, but it’s been there and is still free until Sunday (24 hours left!) This one is a cross-hatching brush and I doodled this guy above using it. First I sketched the basic shape in black and then I ‘etched’ into it with the same brush, but using white to chip away at it (you could also use an eraser) and essentially carve into the black. Finally I made the layer a Multiply layer so that the white disappears and the paper background shows through.
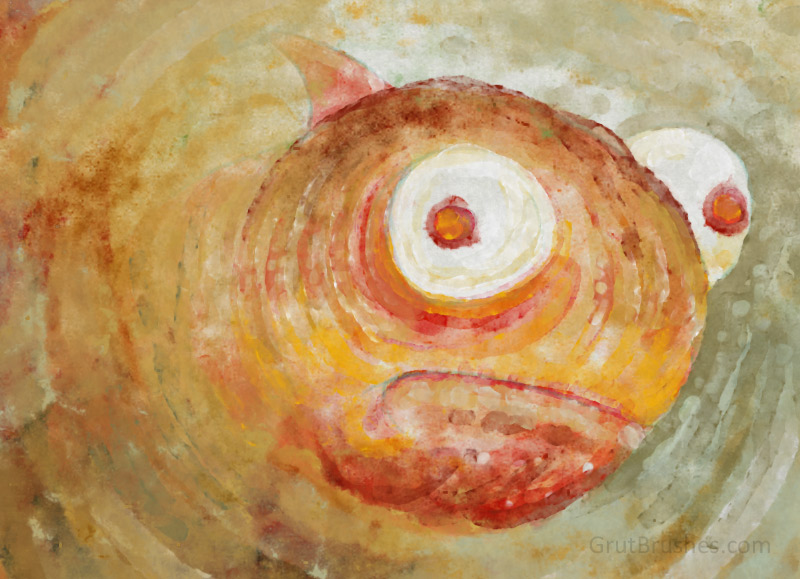
Painting a fish with my Photoshop watercolour brush ‘Creamsicle’ You can watch a 15 second video of me painting this below. Unfortunately I paused the recording towards the end so I sadly missed the last 5 minutes of painting which were in a sense my breakthrough moments on this one. I changed the uppermost layer to Normal from multiply which has the effect of muddying the watercolour effect giving me a look I was happy to end the painting on.
Watercolor in Photoshop can be just as tricky as real watercolor and some of the same techniques apply. A little forethought can go a long way as digital paint ‘dries’ when you lift your pen so ideally you want to do one contiguous area in one unbroken brush stroke. Don’t lift the stylus from the tablet and be prepared that each subsequent stroke will give you a darker colour (see the hair in the top left) due to the multiply effect. Think of it as laying down multiple layers of coloured plastic sheets – the areas where they overlap will be darker and you will see the seams.