Description
52 Photoshop Cloud Brushes and Tools – GrutBrushes Cloud FX brushes
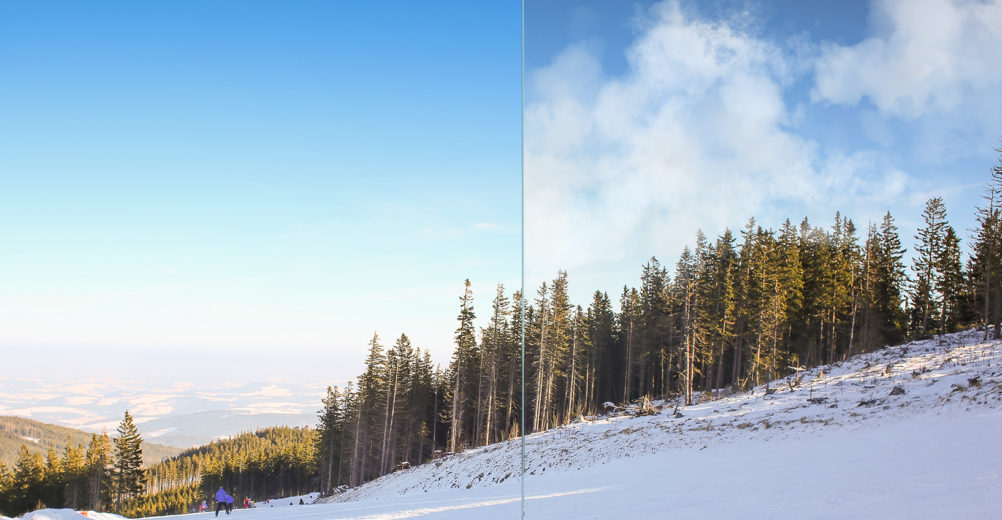
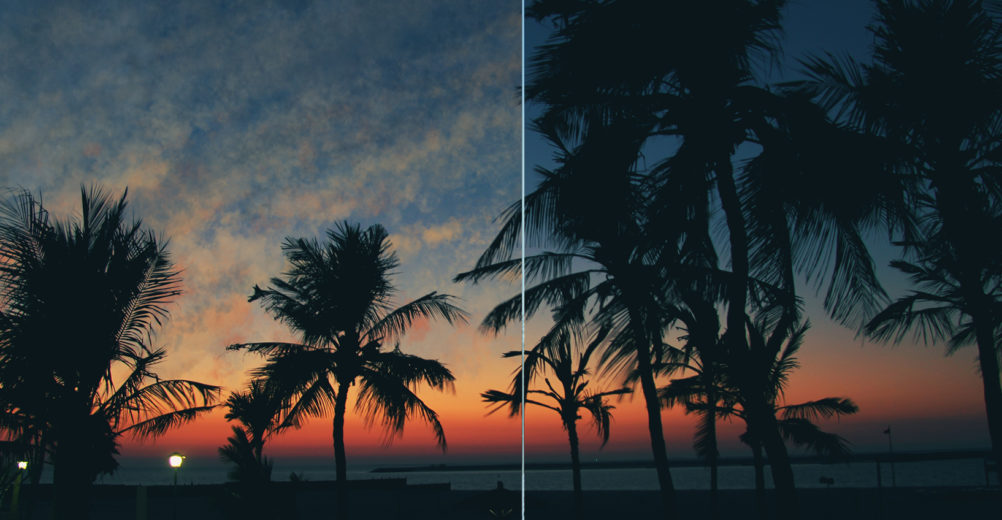
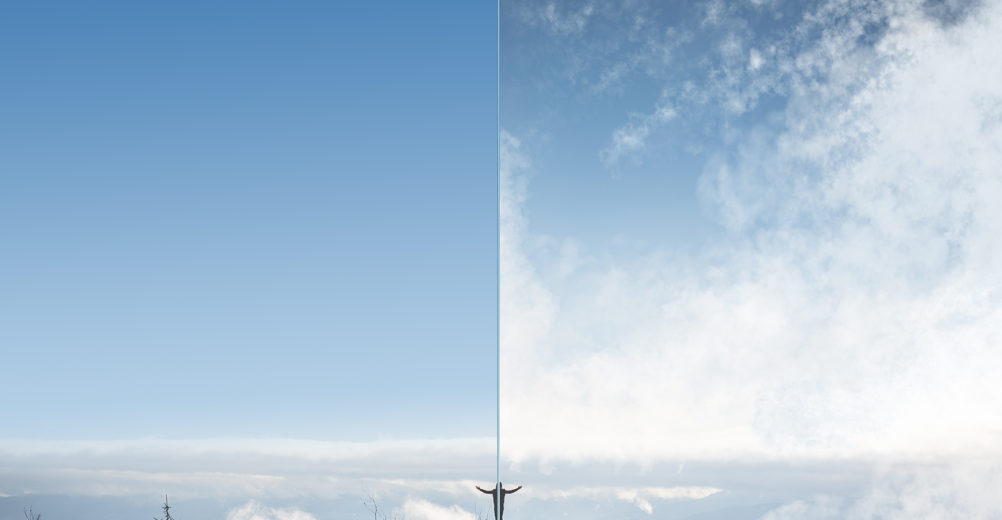
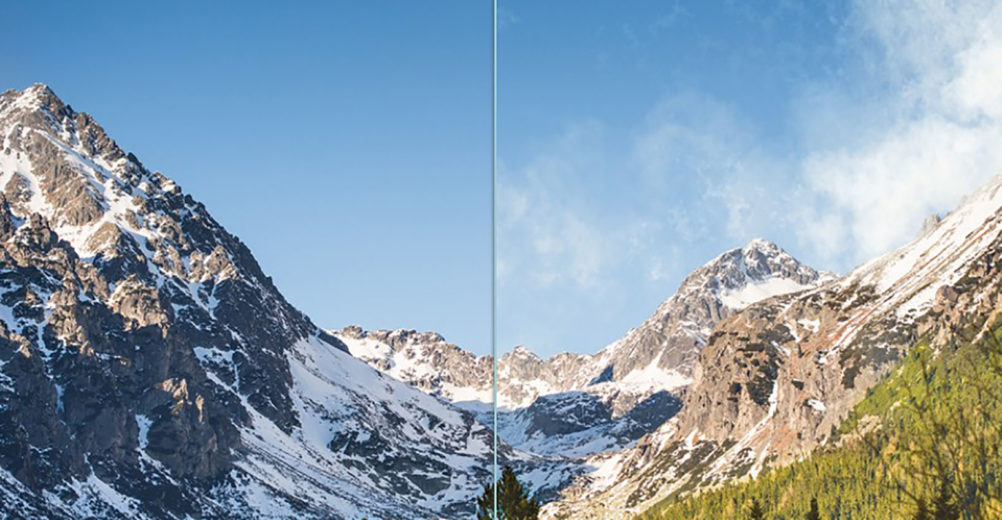
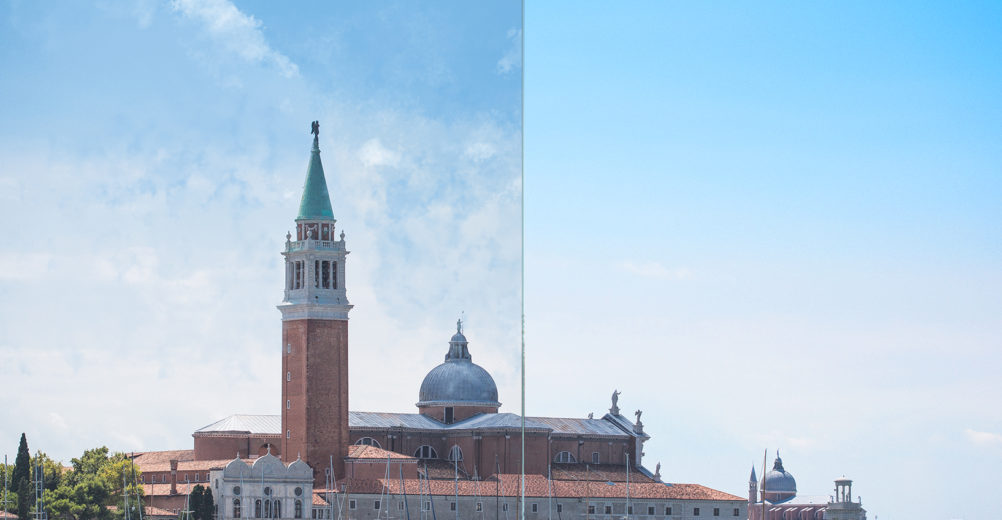
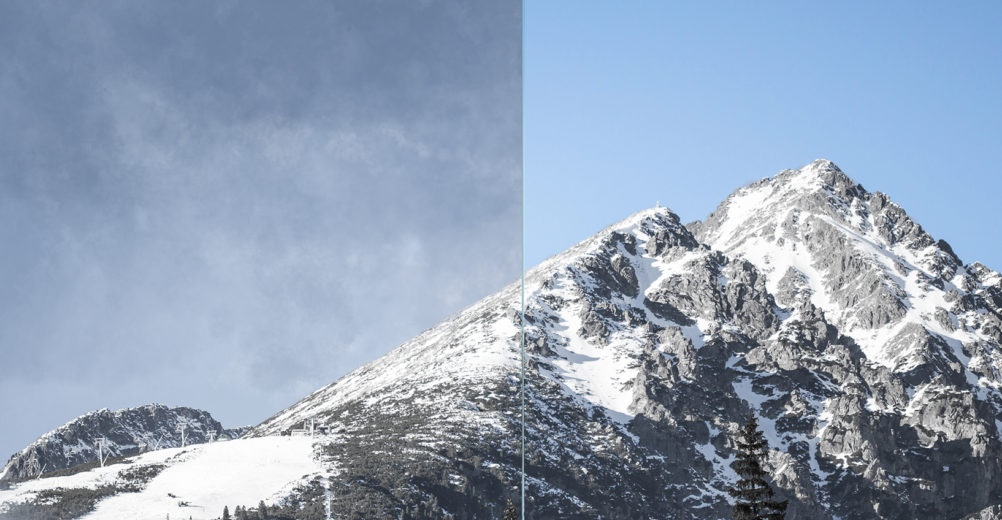
These clouds were all painted in Photoshop in just a few minutes with GrutBrushes Cloud FX brushes, part of the new line of GrutBrushes tools for visual effects, retouching, and Photo compositing.
[baslider name=”PhotoshopCloudvalley”]
Photos by picjumbo.com
GrutBrushes Cloud FX are not stencil stamp brushes. These Photoshop cloud brushes are dynamic and responsive. No two brush strokes will ever be alike. The brushes respond to the individual pressure of each of your strokes of the stylus.

Turn your stylus into a spray can full of fluffy clouds. Pick one of the crispy Photoshop cloud brushes, press lightly for a slight whisp or choose a blobby cummulus cloud brush and push harder to blanket your photo in delicious thick realistic clouds. You can see I got carried away here but take my advice and rather take it easy, the secret to realistic clouds is subtlety. I’m going all out a bit to show off these brushes but a light touch goes a long way in creating realistic skies.
With a bit of practice, a subtler hand than I’ve shown here and a judicious use of the undo button you can get some pretty realistic photorealistic clouds.
Also includes High Res versions of all the Cloud brushes (for print work) If you already own the brushes, check your email for a download link!
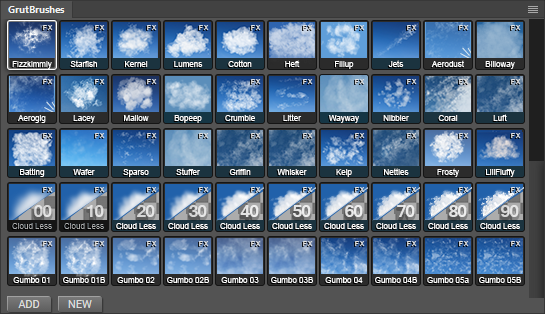
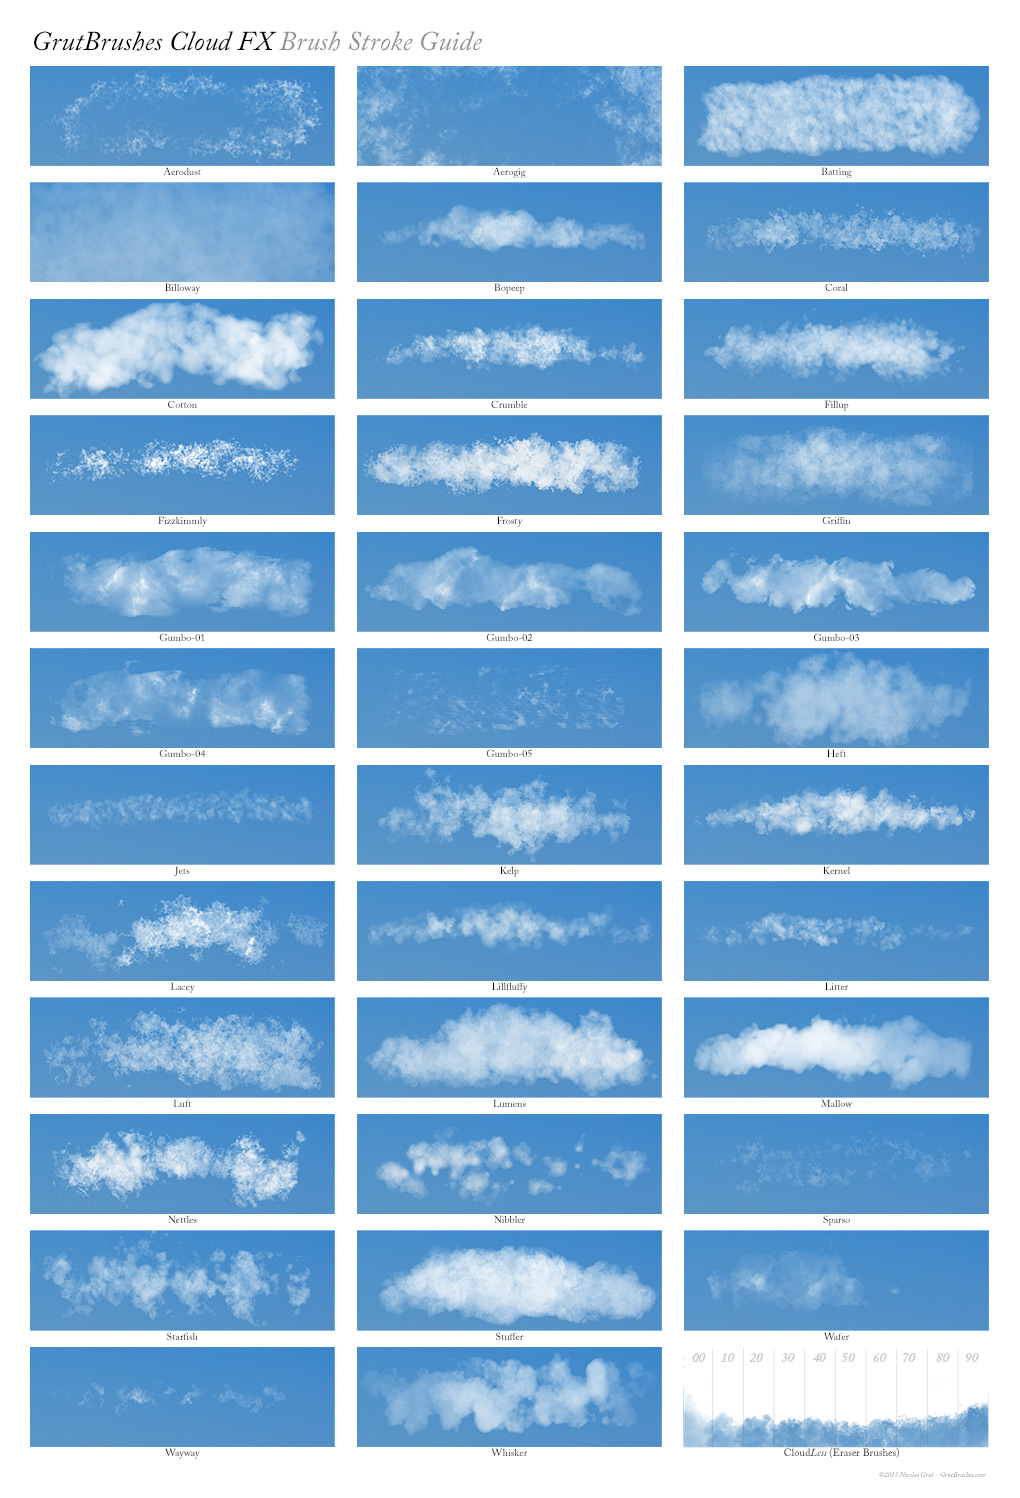
Use the different brushes to make up beautiful skies by combining all the elements that go into a realistic sky full of clouds just the way you want them. Use the “Cotton Cloud” brush for a fluffy cummulus cloud and add crispy whisps around the edges with the “Kelp Cloud” brush. Create jet streak contrails with the “Jets” brush or carve away at your clouds with any one of the 10 “Cloudless” eraser brushes that have the same natural textures as the cloud brushes themselves.
The Cloud FX set includes:
32 Dynamic cloud brushes which have no defined texture, meaning they will never repeat or even show a visible tile seem as they have no static texture. You can draw over the same spot multiple times with a dynamic brush and never get the same pattern.
Also included are the 10 static ‘Gumbo’ Cloud brushes which do contain a texture but provide certain fill textures to enhance the structure of your clouds. Use these brushes to fill in subtler web-like textures where the dynamic brushes may be too overbearing or lack a defined structure.
The remaining 10 brushes are the eraser brushes which you can use to carve away at your cloud layers to shape the clouds to exactly and precisely the way you want them to look.
2 of the dynamic brushes Aerodust and Aerogig allow you to shape the cloud particles by moving your Stylus around. As long as you don’t lift your stylus, you can shift and push the particles around like sand on a chalkboard. Once you lift your hand from the tablet, the cloud particles are ‘set’ in place.
Includes 10 Cloud erasers of different definition sharpnesses to carve away at, shape and fine tune your clouds

Photoshop Cloud Brushes FAQ:
Are there instructions or a manual on how to use the brushes?
The zip file includes a 6 page PDF quick start manual which you can download here with an overview of whats included and also includes some cloud painting tips included as well as the brush guide which shows you a sample of each of the brushes. If you haven’t installed any GrutBrushes before there is also a pdf that explains how to do that.
I bought these, where can I download the cloud brushes?
Check on your account page under ‘available downloads’ if you don’t see a link there for GrutBrushes-Cloud-FX.zip send me an email and I will fix it.
How Do I Get The Plugin Panel with the Cloud Icons that I saw in the Video?
If you use Photoshop CC you can use the Digital Artist’s Photoshop Panel plugin, an extension for Photoshop that gives you thumbnail previews of the cloud brushes (and any other GrutBrushes you have including the free sampler set) it is free but you will need to download it separately here.

Are these free to Art Brush Members?
No, sorry, FX brushes are not part of the Art Brush series.
I didn’t get any email from you! Where is my email?
Make sure info@grutbrushes.com is not going to the spam folder.
Cloud Painting tips and Tricks
Always start on a new layer
This way you can have complete control over what the clouds look like and reduce the layer opacity to blend them into the image more. Cloud eraser brushes will not work on a flattened background layer
A light touch goes further than a heavy hand
Using a light touch with your stylus will not only give you a ton of flexibility and control over your clouds, it will also produce much more realistic clouds. It’s much better to paint multiple layers of clouds on top of each other than to press hard and create thick overbearing clouds. Subtlety is key and remember what you’re creating after all: clouds are made of water vapour with air in between so give them a lot of air and space to breathe.
Use Layering to Create Texture
When you apply multiple layers of cloud on top of each other, where they overlap can create beautiful rich organic textures, the more layering the more natural it will look. Remember that when you look at clouds you are seeing through multiple layers of water droplets, they way they overlap is what makes the shape.
Erase frequently
Undo to redo. As the clouds are unpredictable, get into the habit of drawing with your fingers on the undo keys, this way you can stroke on a cloud quickly, undo and redo until you like the cloud you’ve put on your canvas
Use any of the Cloud Brushes as erasers

‘clear’ turns a Photoshop cloud brush into an eraser
Change the mode from Normal to Clear to instantly and temporarily turn any of the Photoshop cloud brushes into an eraser.
Use the cloud brushes for Smoke, steam and other Atmospheric Effects
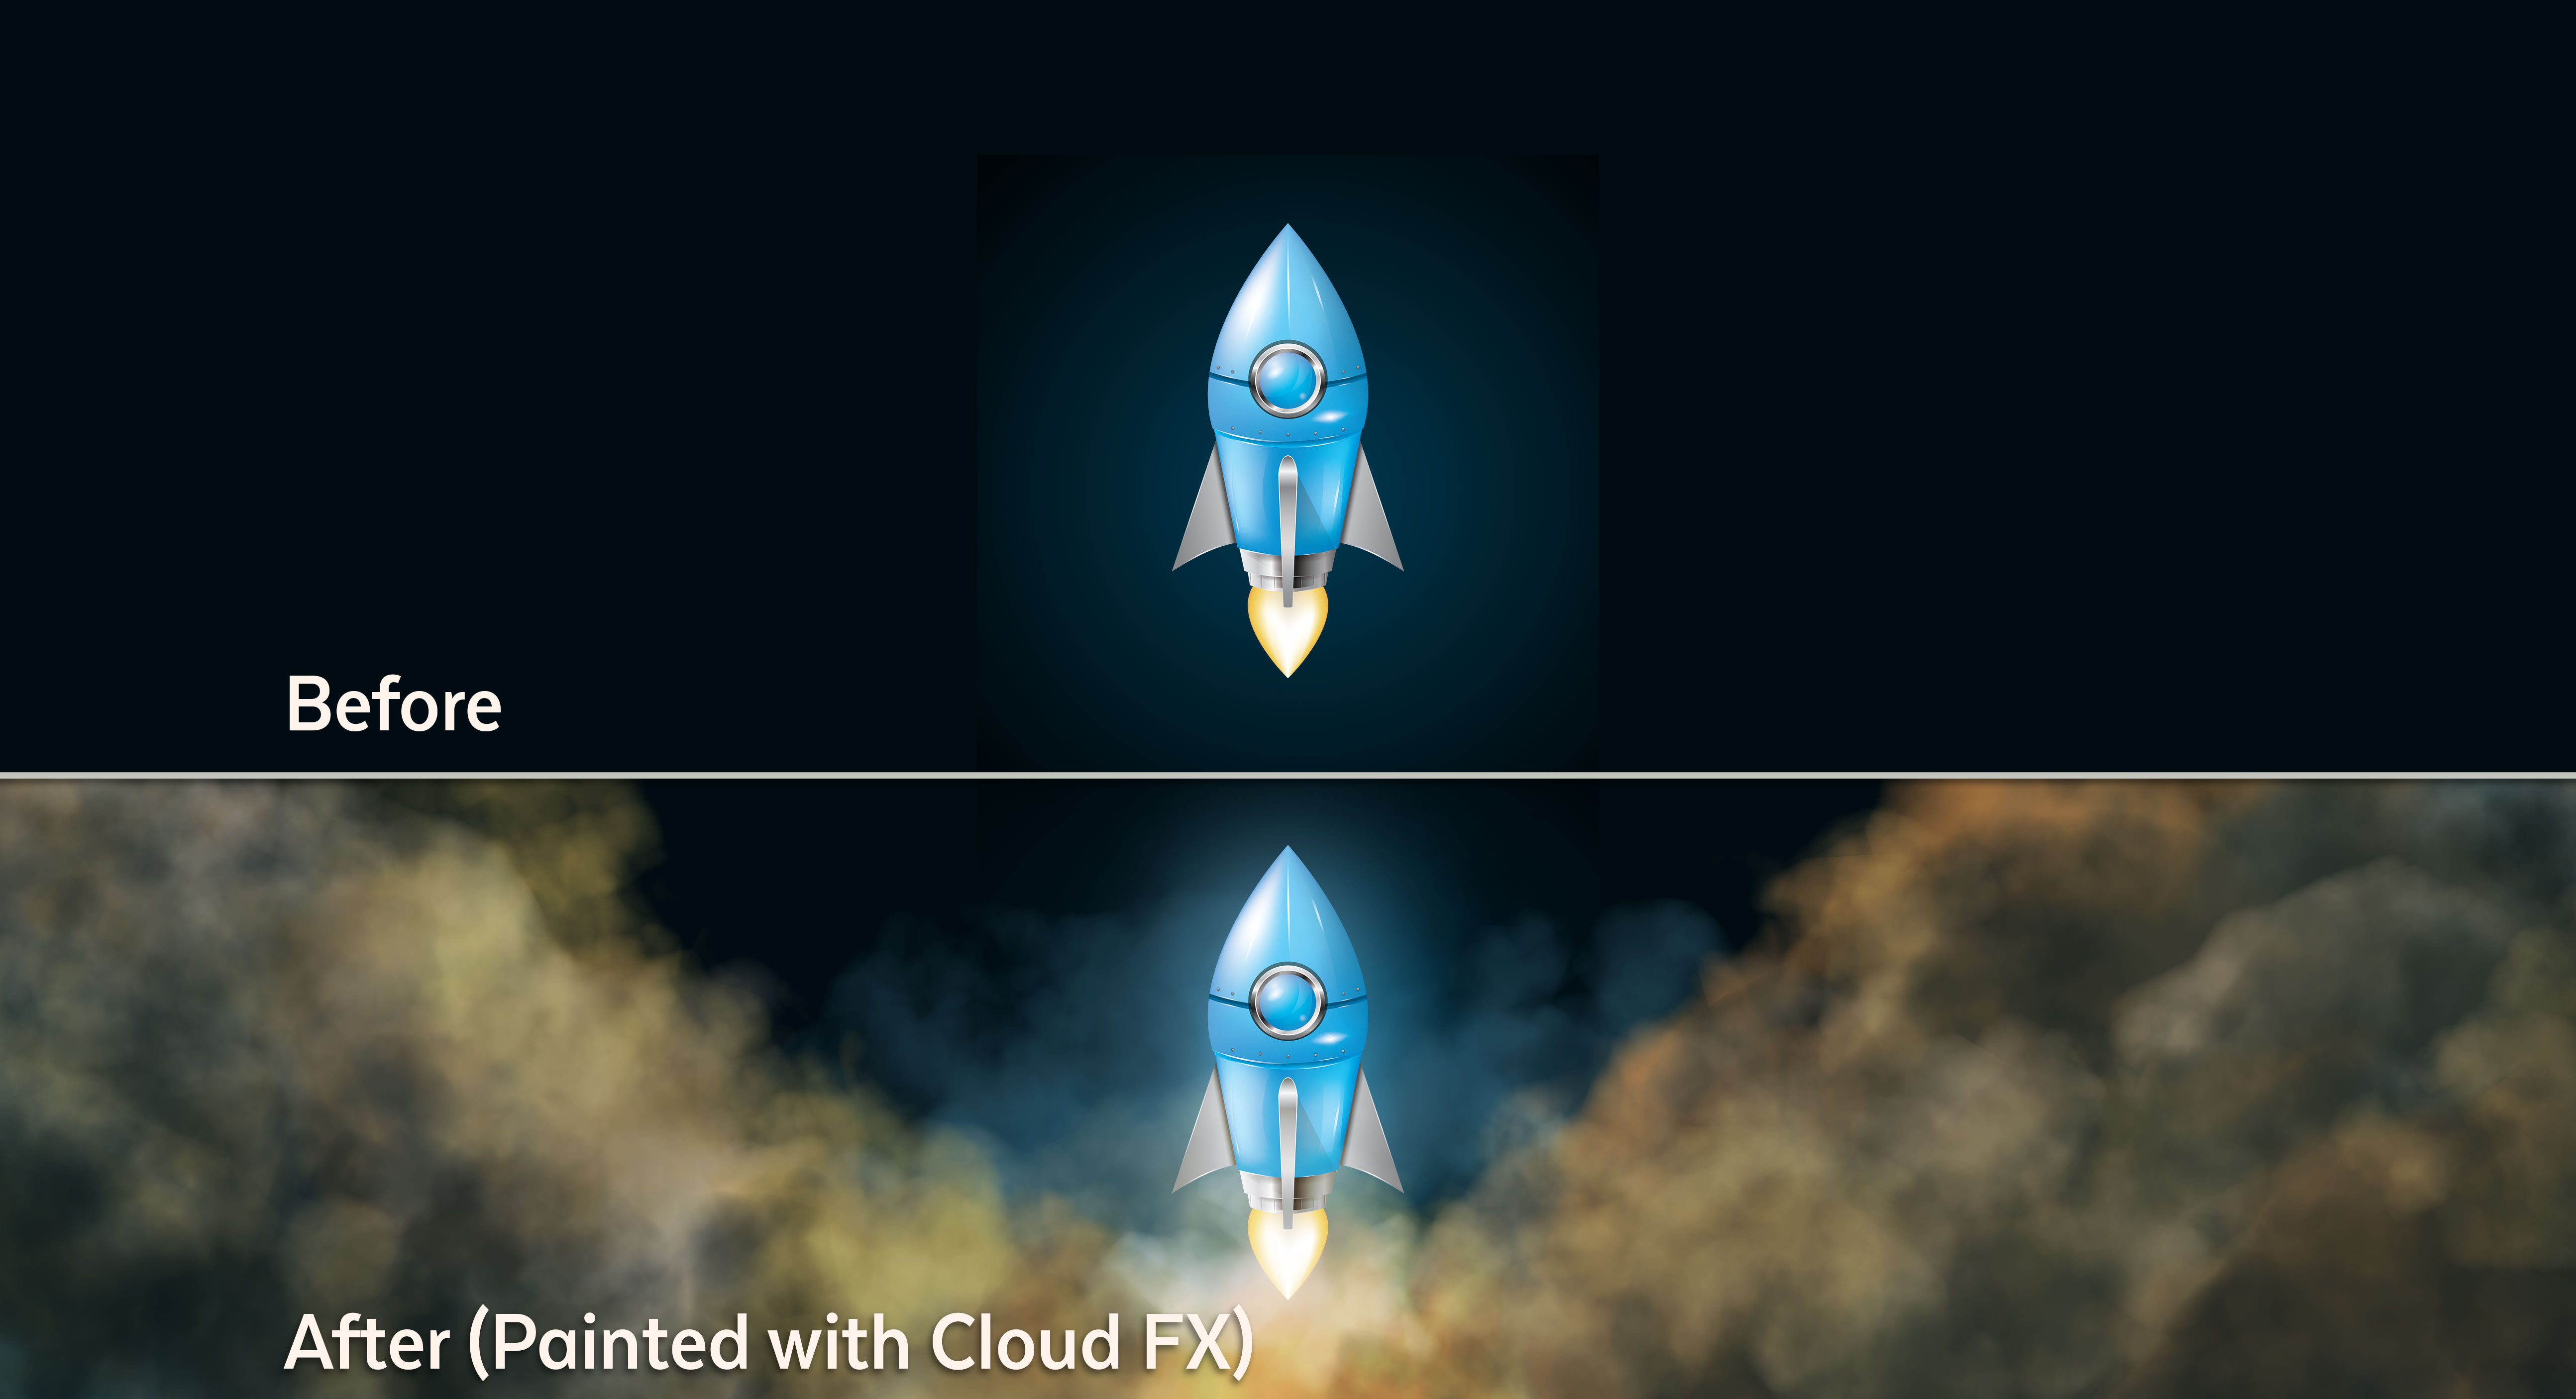
Pick from your on-screen palette
Clouds are rarely white in the real world, they are made up of reflected light from their environment. Use option/alt to click and pick your colours from your image, especially when working on a photo. Pick new tones frequently to vary your hues while keeping it integrated with it’s environment.


Laura Emerson (verified owner) –
Fab brushes, easy to install and I found the explanatory pdf and brush stroke guide very well done and helpful. Just what I was looking for, at a reasonable price. Thank you very much! A quick question about the high res brushes, how do they differ from the web res ones and how big can they be “pushed”?
Orval –
Finding the right remedy for your personal machine problems when you really need them permits you to focus Cartridge on Wheels Reno
your business’s important projects, office production and daily
tasks. 2nd the answer to success: Install the CPU heatsink – If you like to visit an excellent place to enjoy
some aircon when you happen to be hot, the same can be said from the CPU that you’ve just installed.
multifunction printers happen to be designed to meet the criteria for almost
any type of office, whether it’s a small business
or possibly a large corporation.
JonLuceArt (verified owner) –
This company keeps knocking it out of the park! I started with the 450 brush pack, but could NOT just acquire those. I also picked up these amazing Cloud FX brushes. The prices are seriously low compared to many others I have seen and once I purchased the 450 pack, other products became even less costly!!!! Also, the customer service is a pleasure to work with if you have ANY issues. Fast responses even when it is a USER ERROR, …. my fault LOL. Thanks for these great FX brushes, looks like the splatter brushes are next on my Hit List!
Dean Griffiths (verified owner) –
Just purchased so haven’t had much time to test, but so far easy 5*.
Easy installation just dragged the zipped folder into the Grutbrushes plugin panel give it a few seconds to load and thats its.
I have had a little bit of a play around with it a looks super.
Thank you
Digital Lady Syd (verified owner) –
Not sure why I have not commented on these fabulous brushes before! Still the best cloud brushes around. So glad I have them!
Nicolai –
Thanks so much Syd! I love that you use them in your photo work on your photography blog
jimcos10 –
thank you Nicolai, I purchased the Art brushes complete set and although i haven’t tried them all i can see how well they work with my pressure sensitive tablet and pen. i would and have recommended them already and will be checking out more of your brilliant brushes. they were easy to install and before i knew it they were all installed into the free plug-in. i think my next purchase will be the cloud brush set. all of these sets are great value and for any one from total beginner with through. thanks again.
Nicolai –
What a nice review! Thanks so much Jim. I’m so glad to hear that you are getting good use out of the brushes and liked them enough to come back for more. Happy creating Jim!
Marco –
Same question as Kepa, will they work in Affinity photo (for ipad)?
Nicolai –
Thanks for the question Marco. I was just telling Kepa that I tried to import them into Affinity photo but the results were disastrous, so they wont work in there. I am going to try them in Artstudio Pro on the iPad next week. I imported a few of my other brushes and they worked perfectly in ArtStudio Pro so there may be hope there. It’s a great app regardless!
Kepa –
Can I use with Affinity Photo?
Nicolai –
I wish Kepa! I tried a quick experiment and they don’t convert at all, so they would probably have to be recreated from scratch.
Nicolai –
Sorry that you didn’t find them useful. Thanks for the suggestion.
kiger S. –
I am very disappointed with my purchase. The resolution of these brushes is tiny if you work with a big canvas, making these brushes useless. Could you please upgrade these brushes (especially Mallow) so they can be used by everyone? I can’t use them at all now.
All of your other brushes are perfect except for this Clouds pack.
Will give it 5 stars when the resolution is suited for bigger canvases! 🙂
Nicolai –
Hi Kiger,
I sent you an email quite a while ago letting you know that your wish came true! The brushes are also available (included) as a High resolution set (Since July 2017) If you don’t have them yet you can download them from your account Buying the cloud brushes gives you both the web res and the High res sets. I hope that helps you re-consider your rating.
Nicolai –
Thank you for that thoughtful and very valuable feedback John,
any suggestions you have on what might be missing from the installation PDF would be very helpful. I will review it regardless and see where I can make improvements.
That is a very good point you bring up regarding working at high resolution. I will look to include a Pro version of all the brushes, sized up and more appropriate for those who work with high megapixel photos. If I add this I will send out an email notification.
As for foreground/background usage, the early version of this brush set did work that way, but it required too much instruction to the user. Most people just jump in and start using the brushes, and couldn’t figure out why the colours weren’t matching their photo. Getting people to pick their cloud colour from the source photo is enough of a challenge. Trying to get people to pick foreground and background colours from their source proved insurmountable, and mostly resulted in frustrated users. I agree that this is a valuable technique and definitely warrants at least a tutorial and a mention in the documentation.
Thank you so much for taking the time to share your valuable thoughts, John. Very helpful indeed!
John (verified owner) –
I debated giving a slightly lower rating but I think my initial challenges can be easily overcome. The brush are very interesting and they are easy to use with my Wacom. For the price they are hard to beat. The first issue I had were a less than smooth installation. I think there are a few missing details in the install PDF. The second issue is that I shoot with a 36MP D810 so my files are huge which makes the default brush sizes seem tiny, they are easy to change but I can’t really use any of them without major adjustments. Compounding brush size issue is that I work on 4K displays. I was also kind of hoping that the foreground and background colors could be used but only the foreground color is applied and the “shadow” appears to be the same color fading to gray.
I am looking forward to breaking my images into multiple layers to that I can paint clouds behind foreground objects. I don’t think this will be too difficult.
herkeybh (verified owner) –
cant get them to load and no help anywhere!!
Nicolai –
Hey there!
So sorry you’re having trouble. There are detailed installation instructions in the PDF in your download (It’s also online here) There is also help page here with a quick install video If that doesn’t do it you can always email me anytime and I will be glad to help you get them installed (or give you a refund if you’d prefer, just let me know)
A J Reeve –
Haven’t tried it yet; still trying to buy it. Five for a great and welcome idea.
Davdub –
I’ve made some brushes myself over the past few years and know the difficulty and skills needed. These look just fantastic. I’ll be purchasing this evening as they look terrific and required a lot of work. Well worth the few $$$’s.
zerxesc –
Wow! it’s like I’m having a cloud with water in it! As if I’m painting the sky! So cool
Anthony Restar (verified owner) –
I’m very happy with mine!
Michael –
I received the Clouds Brush Set today and with a few minutes I was painting very realistic clouds. The instruction video was very helpful.
Maryann (verified owner) –
Wow! Great cloud brushes! I just downloaded them into PS and I say “Let the fun begin!” These brushes are so realistic. Thanks!! 5 Stars!