Description
Photoshop Calligraphy Brushes
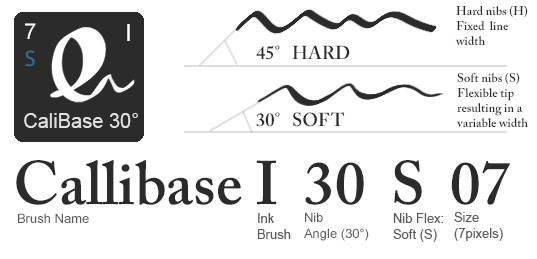
The calligraphy brush name tells you everything you need to know about what they do. The codes in the name and on the icon (if using the GrutBrushes plugin) refer to…
- The Name (Callibase)
- Type: I (ink)
- The Angle of the Photoshop brush/nib (30 degrees)
- Flexiblity of the brush is (Soft) and the
- Size of the brush (07 pixels)
These Calligraphy brushes have been ‘engineered’ to keep your lines crisp and clean edged with a slightly more aliased line than the traditional hard round default Photoshop brush setting.
FAQ:
Q: What is the difference between the 30 and 45?
A: The number after the “I” (for ‘ink’) in the name refers to the angle of the nib. That is what makes and defines the angle of the thin part of calligraphy letters (you can see a better illustration in the image at the top of this page where the two angles are compared.

Q: Why the 3 sizes? Can’t I make it any size I want?
A: Yes you can, these sizes are mostly for your convenience. You now have a brush preset that is ready to click on and go. These are also intended to be used with the free GrutBrushes Tool Panel plugin (Photoshop CC only) the various presets enable you to load only the ones you use frequently into Photoshop and have them easily available and ready to click and go.
Q: Do I have to have the GrutBrushes plugin to use them?
A: No, they work just fine in the Tool Presets panel (see here)
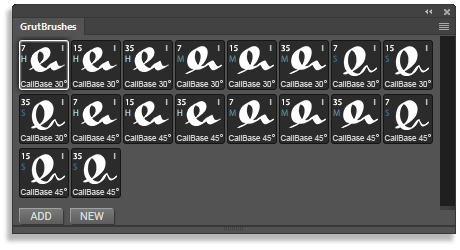
Q: What is the difference between S, M and H?
A: That refers to the hardness of the brush pen nib; Soft Medium or Hard, which affects the width of the line, not the softness of the edge. Think of a soft metal pen nib that bends when you press on it versus a hard metal tip which remains rigid no matter how hard you press. A soft nib (S) will create a wider line the harder you press on your stylus, a Hard brush will always draw the same width of line no matter how hard you press on your stylus and a medium has a slighly variable line but will not draw a fine point no matter how lightly you press. This is the digital equivalent of how bendy of a metal the nib is made out of.

Q: I am used to abr files, what are these and how do I install them?
A: These are TPL (Tool Preset) files and this PDF is included which shows you how to install them, You can also get some quick helpful illustrated tips here if you get stuck:
How to install the tpl brushes in Photoshop
Where to find the brushes you installed in the tool preset panel
TIP: I don’t recommend keeping them all installed. You will find that you probably like and use two or three of these regularly. To keep your Photoshop lean and clean, I recommend loading only the brushes you use frequently and delete the rest from Photoshop.

Want More?
If you are looking for more brushes for lettering in general, many of the other hundreds of GrutBrushes for digital Artist’s are great for hand lettering. You can browse animated previews of them in the Shop (click on the orange ‘play’ button on each icon) Or get the whole Artist’s Brush Set here (includes a free 2 month membership!)

jorge –
thanks for the brushes
skyrenia (verified owner) –
Those brushes are perfect! They feel natural and it’s like you work with a normal calligraphy pen, but you have many more possibilities to correct the lines.